Transform Your Visuals with Anamorphic Lens Flare Overlays
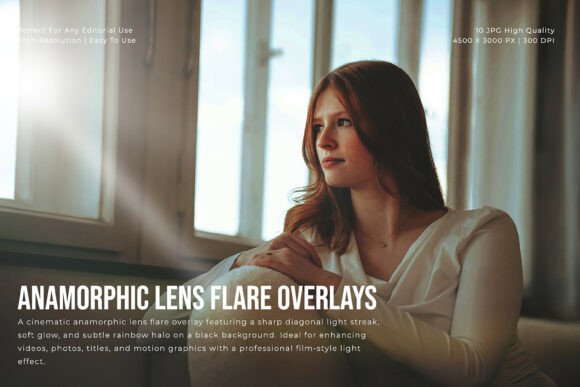
There’s a specific quality to the light in big-budget films. It stretches horizontally, creates soft glows, and adds a layer of texture that feels immersive. This effect, known as anamorphic flare, is a hallmark of cinematic storytelling. While originally achieved through the unique optics of anamorphic lenses, you can now apply this signature look to your own work with Anamorphic Lens Flare Overlays. This collection provides the authentic streaks, halos, and glows that define modern cinematic visuals, allowing you to enhance your projects with a professional, film-style aesthetic.
Understanding the Anamorphic Aesthetic
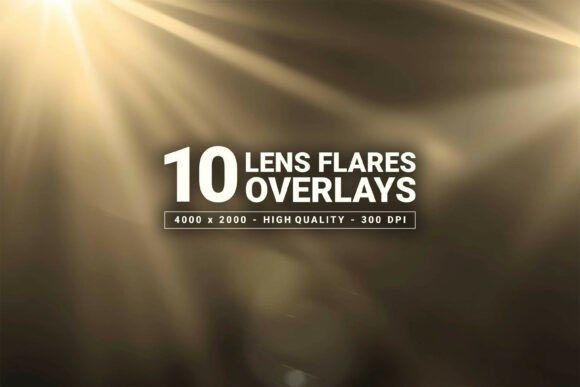
An anamorphic lens flare is distinct. Unlike simple starbursts or circular glows, it produces a characteristic horizontal light streak that can span the entire width of the frame. The Anamorphic Lens Flare Overlays pack captures this perfectly, offering sharp diagonal light streaks, soft diffused glows, and those subtle rainbow halo effects that occur naturally with high-end cinema lenses. The overlays are provided on a dark background, which is essential. This allows you to use blending modes like Screen or Linear Dodge (Add) in your editing software, seamlessly integrating the light effects onto your footage without complex masking.
The personality of these overlays is dramatic yet refined. They don’t overwhelm an image; they enhance it, adding a sense of depth and scale. The high contrast and smooth light transitions mean the flares look organic, not digitally pasted on. This is crucial for maintaining the integrity of your original content while elevating its emotional impact.
Where Cinematic Flares Make the Greatest Impact
The applications for this style of design asset are incredibly broad, spanning both digital and print mediums. Think about the last time you saw a compelling movie poster or a high-end product launch video. The lighting often tells as much of the story as the subject itself.
- Film and Video Projects: This is the most direct use. Adding these overlays to title sequences, trailers, music videos, or narrative scenes instantly boosts production value. They can simulate practical light sources like car headlights, streetlamps, or studio lighting, tying a scene together with a consistent, professional glow.
- Photography and Retouching: For portrait, editorial, or landscape photography, a subtle anamorphic flare can add a dreamy, cinematic mood. It works exceptionally well in editorial design for magazine spreads or in creating standout social media graphics that stop the scroll.
- Branding and Marketing Materials: For entrepreneurs and small business owners, establishing a brand identity that feels premium and modern is key. Incorporating these flares into promotional videos, website hero banners, or even as subtle background textures in packaging design can convey sophistication and creativity. They pair surprisingly well with clean sans serif font choices in logo design or web design elements.
- Motion Graphics and Presentations: If you create explainer videos, corporate presentations, or animated titles, these overlays add a dynamic, polished finish. They guide the viewer’s eye and make static text or graphics feel more alive and engaging.
Integrating Overlays into Your Creative Workflow
Using the Anamorphic Lens Flare Overlays is designed to be straightforward, but a few practical considerations will ensure the best results. The pack includes 10 high-resolution JPGs (4500 x 3000 px at 300 DPI), making them suitable for large-format print and high-definition video.
- Choosing the Right Overlay: Not every flare will suit every project. Consider the lighting direction in your base image or footage. A horizontal streak might work for a landscape, while a more diagonal or subtle glow could be better for a close-up portrait. Experiment with a few options before committing.
- Blending and Adjustment: The key is subtlety. After placing the overlay on a layer above your content, try different blending modes. Screen is usually the best starting point as it only adds light, ignoring the black background. You can then adjust the layer opacity to control intensity. Using Photoshop, After Effects, or Premiere Pro’s transform tools allows you to scale, rotate, or warp the flare to match your scene’s perspective.
- Color Harmony: The natural color of the flares is neutral, but they can be tinted. Use Hue/Saturation adjustment layers clipped to the overlay layer to shift the color to match your project’s palette, whether it’s a warm golden hour scene or a cool, blue-toned night shot.
- Maintaining Readability: If you’re adding flares over text—such as a display font in a title sequence—ensure the light doesn’t obscure the letterforms. Position the flare so it enhances rather than competes. This is where the visual hierarchy of your design is critical; the flare should support the message, not become the message.
Ultimately, the goal is to use these overlays as a tool for storytelling. They are a form of modern typography for light, shaping mood and focus. By treating them as a premium font for your visual composition—one that requires thoughtful pairing and placement—you’ll move beyond simple effects and into the realm of intentional, professional design. Whether you’re a content creator looking to elevate your video work, a marketer crafting an unforgettable campaign, or a hobbyist exploring creative photography, these overlays provide a direct path to achieving that sought-after cinematic polish.